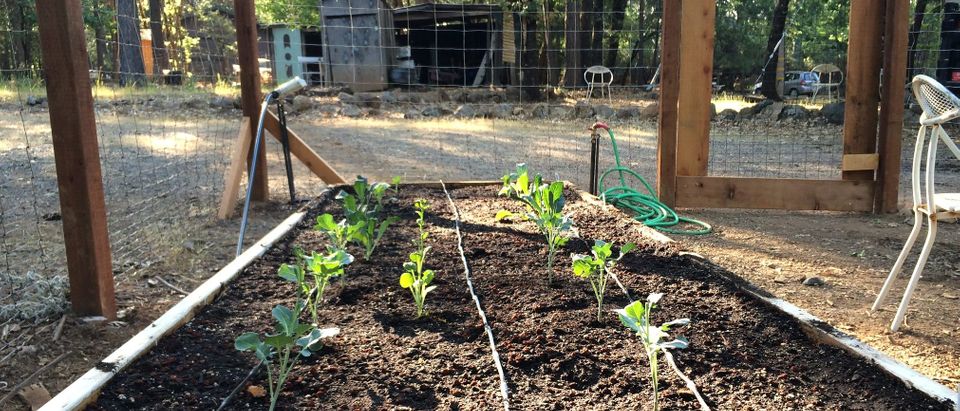
If you’re not sure how long your local quarantine, lockdown or distancing restrictions are going to last, it’s best to start thinking about how we all can become more self-sustaining in the interim, long run and immediate future.
Assuming you’ve gone ahead and purchased your seeds, you’ll need to start making a home garden or growing enclosure if you want to get started.
Why a home garden? Specifically, if you create your own garden at home with an added enclosure, there are plenty of added benefits including: keeping animals and pests away, provides raised infrastructure that works well for soil enclosure and possible drainage, separated from rest of yard, control sunlight, limit exposure to the elements and more.
How? Ideally, start with a good cut of wood like cedar. If that’s too expensive, you can try douglas fir or some sort of framing lumber. If your wood is treated or finished, ensure (through research or asking store employee) that the treatment is non-toxic and okay for gardens/raised beds.
Here’s how to construct an enclosed garden; recommended sizes included work in tandem with one another.
Step 1:
On a flat, level surface, lay out two posts (4×4 recommended) and attach a post at the top and bottom (2×4 and 2×6) with wood screws (3″) and exterior glue. At the center attach another post on edge (2×4 cut to 72”).
You should have what looks like two door frames, measure twice (especially diagonally) to ensure the same size. Now do this twice; these are your two main walls.
Step 2:
Attach a pair of 2x4s at the top and 2x6s to the bottom with 3″ wood screws and glue. Again, these can be whatever sizes you choose, but they must be proportionate and the same size.
Essentially you are connecting your two frames to make a cube with two open sides, and two sides with your center post in the middle.
Again, double and triple check your measurements – since you want a square not a rhombus – and place your structure where you want it to stay permanently.

This chicken wire may be too low to keep out some creatures (creative commons)
Step 3:
Attach two more 2x4s (cut to 72″ or equivalent length for your structure) on their edge – the same way you did in step one – on the open sides. Attach 24 inches from the corners; this will create two sides with three evenly spaced sections, to go with the other two sides that are divided into halves.
At this point you should have a free-standing structure.
Step 4:
Now, wrap a portion of the bottom (two-thirds of the height is recommended, in this case four feet) in mesh, chicken wire (most effective) or what-have-you to prevent the critters and your neighbors from crawling into your enclosure for those sweet veggies.
You can secure it in several ways: rows of wood on the exterior screwed in to secure the wire, large staples/staple gun, glue, zip ties, etc.
Step 5:
Depending on how deep you want your raised beds to be, attach boards (on their sides) evenly on both sides. The spaces between the boards and your walls are where you’ll fill with soil.
From here on everything is optional. If you want a multitude of beds, erect more separators; just be sure to fix them securely and evenly or risk the weight of the soil spilling out the sides or toppling over the panels.
At this point you can attach a door; this will require more craftsmanship involving hinges and latches of course, or a roof which you can create with basic elements like sheet metal (might be loud in the rain) or, more complexly with wood or tile.
You can always upgrade your structure for stability (or to prepare for said roof) with more support panels by securing wood panels diagonally between corners. Or, you can attach them to the ground or base on the outside; this will make the structure more impervious to wind.
It is recommended that you fill any holes with wood filler, and pack in any corners to keep out rodents. Don’t cut any corners and be meticulous with your wire, ensuring all possible entrances are secured properly.
Have a suggestion for a cool product or great deal that you think Daily Caller readers need to know about? Email our BrightBulb Team at dealer@dailycaller.com.
The Daily Caller is devoted to showing you things that you’ll like or find interesting. We do have partnerships with affiliates, so The Daily Caller may get a small share of the revenue from any purchase.

